If you're looking for a new hard drive for your PC, you might have noticed that external hard drives are often cheaper than their internal counterparts. This seems a bit counterintuitive, as the external drives need, in addition to the drive, an enclosure, a USB cable, and a wall wart, but that just seems to be the reality. Logically, you could simply buy an external hard drive, dismantle it, and install the hard drive inside your PC, but because makers of external drives don't want you to do that, they've made it a challenge.
WD, for example, has implemented measures to ensure that the hard drive won't work once installed in your PC, but we're here to tell you how you can easily override these restrictions. This process is often referred to as "shucking," because it is like getting the cob out of an ear of corn.
1. Test the External Hard Drive First before dismantling. Because you cannot be sure whether your retailer will accept a warranty request on your dismantled external hard drive, it's advised to test the drive first before taking it apart.
To do this, simply plug in the drive into your PC as an external hard drive, and use CrystalDiskInfo, navigate to the drive you want to check, and look whether the drive health is rated as 'good'. For more certainty, be sure to use the drive like this for some time, transferring an amount of data to and from it over the course of a few days and check again.
2. Tear apart the External Hard Drive. Each drive is different to take apart, but WD's Elements drives (as well as the WD EasyStore drives purchased at Best Buy) come apart easily when you place a thin blade into the rear edge of the enclosure and twisting it. Use the long edge of a knife and avoid sticking it in too far to prevent scratching the label on the hard drive inside.
Don't be afraid of popping the plastic, unless you're in an especially frigid room, it shouldn't snap. Once you snap casing off on both sides of the rear of the drive, it should slide right off, exposing the white-label WD drive.

Here's a secret we didn't tell you: if you're very careful throughout the disassembly process and don't ding or scratch anything, it should be impossible to tell that you have dismantled the drive. This ups your chances of a successful RMA should disaster strike one day.
3. Push the drive out sideways
4. Remove the USB control board. There are usually two screws attaching the USB control board. Use a screwdriver to remove these and slide the board off the SATA port of the hard drive.
5. Plug the Hard Drive into your PC as if it were a normal internal hard drive. For some external hard drives no modification is necessary to get it working internally. Make sure your PC is off throughout the process.
6. Check whether the drive is recognized in the BIOS. If the drive is detected in the BIOS and Windows after this step, you can skip step 7.
As you can see, my two 4 TB hard drives are recognized, but there is no sign of the new 8 TB drive. This means we need to modify the hard drive to block the 3.3v circuit.
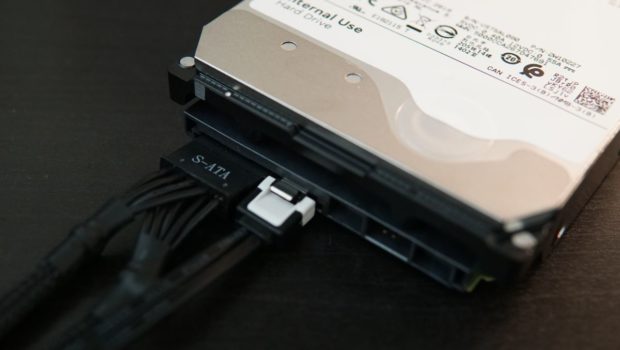
7. Tape over the Third Pin from the left on the SATA power connector. WD's security measure works by detecting a 3.3v signal on this pin, which when it does will disable the hard drive. By taping over it, you prevent the drive from going into its disabled mode.
If you find it difficult to tape over this single pin, you can also tape over the left three pins, as the first two pins also do not serve a purpose. A thinner tape will make it easier to slide the power connector on without pushing the tape away.
8. Install the Hard Drive. Now, install the hard drive into your PC case and connect the SATA data and SATA power cables, and boot up your PC. If all is well, the drive should now be detected in Windows and fully operational.
Congratulations. You have now successfully shucked an external hard drive for use inside your PC.


Gloss